Showing posts with label bricks. Show all posts

Thursday, 24 July 2014

Cladding and downpipes

This week saw the eaves, downpipes and cladding done. Our bricklayer didn't install the flashing behind the bricks at the front of the house where the cladding has been installed so two rows of bricks had to be removed, flashing installed and bricks replaced. 

We are still waiting on the bricks to be acid cleaned. I am not sure now if this can be done until the new mortar has had time to set.

The bricklayer informed us that our Tyrells inspection is scheduled for tomorrow. I hope so. That means we are one step closer to lock up!


Tuesday, 15 July 2014

Our brickwork is complete!

Our brickwork was completed today. It took the bricklayer a total of 11 days on his own to finish our house and he has done an awesome job.  Our SS said he is one of the best bricklayers in the business and that we are assured to have a beautiful house when he is finished, so I am wrapped with that endorsement!

It started raining this afternoon so I didn't get a chance to stop and take any photos but will definitely stop by on my way home over the next couple of days.

The gutters and fascia were installed late this afternoon and the roof is scheduled to go on before the end of the week. Yay!

I am soooo excited!!!

Wednesday, 9 July 2014

Another day of bricking

Today is day 6. I am really happy with quality of our brickwork. Our bricklayer is doing a fantastic job (and yes, we only have one bricklayer working on our house). He thinks he will be finished by the end of the week.

The photos taken today aren't the best because of it was so bright but you can see how much he has done to date.


Thursday, 3 July 2014

Bricking continued....

I took a drive past to see how much had been completed today. It looks fantastic....

While sneaking around the site to take these photos, I almost took a fall in the wet sludge on the building site from the brick clean from my neighbours house. It would have been a funny sight to see. I am just glad nobody was around. I didn't realise until the next morning that my shoes were completely covered in mud!

Here are some photos I took tonight - day two


 A close up of our bricks with off-white mortar (raked)


Bedroom 4


Wednesday, 2 July 2014

Bricking has started

Our brickwork started today.

I think our bricklayer is doing an exceptional job.  He seems very meticulous. The work he has done so far appears to be clean and tidy. They didn't do a great deal (not that I know what to expect in a days work) but I am really happy with the quality of their work and I am more than happy to see them take a little longer if it means we are going to get a great job from them. I believe it is one bricklayer and his labourer (perhaps a father and son team).

Here are some photos from day one.


Home theatre wall, bedroom 2 & 3


Home theatre wall, bedroom 2 & 3


Tuesday, 1 July 2014

Our bricks have arrived

I drove past our house this morning to find the bricks being dropped on site. What a beautiful sight it was. Here's hoping that the sand and cement are delivered later today so that they can get started on bricking tomorrow.

The plumbers are also there this morning doing our rough in. I can see them inside the house, courtesy of the eye :)


After site clean


After brick delivery


After sand and cement delivery


We are good to go tomorrow....I am so excited!

Monday, 22 October 2012

The fun stuff...

Colours, Kitchen, Landscaping & Plumbing 

Today is day 1 of our colour selection process....I have been looking forward to this day since signing our tender.  For the past few months I have spent most nights on the internet researching and preparing for this day.  Homeone has been an invaluable resource. There are so many helpful and knowledgable people that are happy and willing to share their expertise and experiences with you. I highly recommend this website to anyone whom is building their own home.  There is a link to the website on my home page. The exciting part is knowing you have total control over the colour scheme and finishes in your home.

Our appointment was booked for 9am and we were on time and filled with enthusiasm and anticipation for the day ahead. Don't get me wrong, I was feeling a little anxious and uncertain that I was 100% prepared and ready to make the right choices.

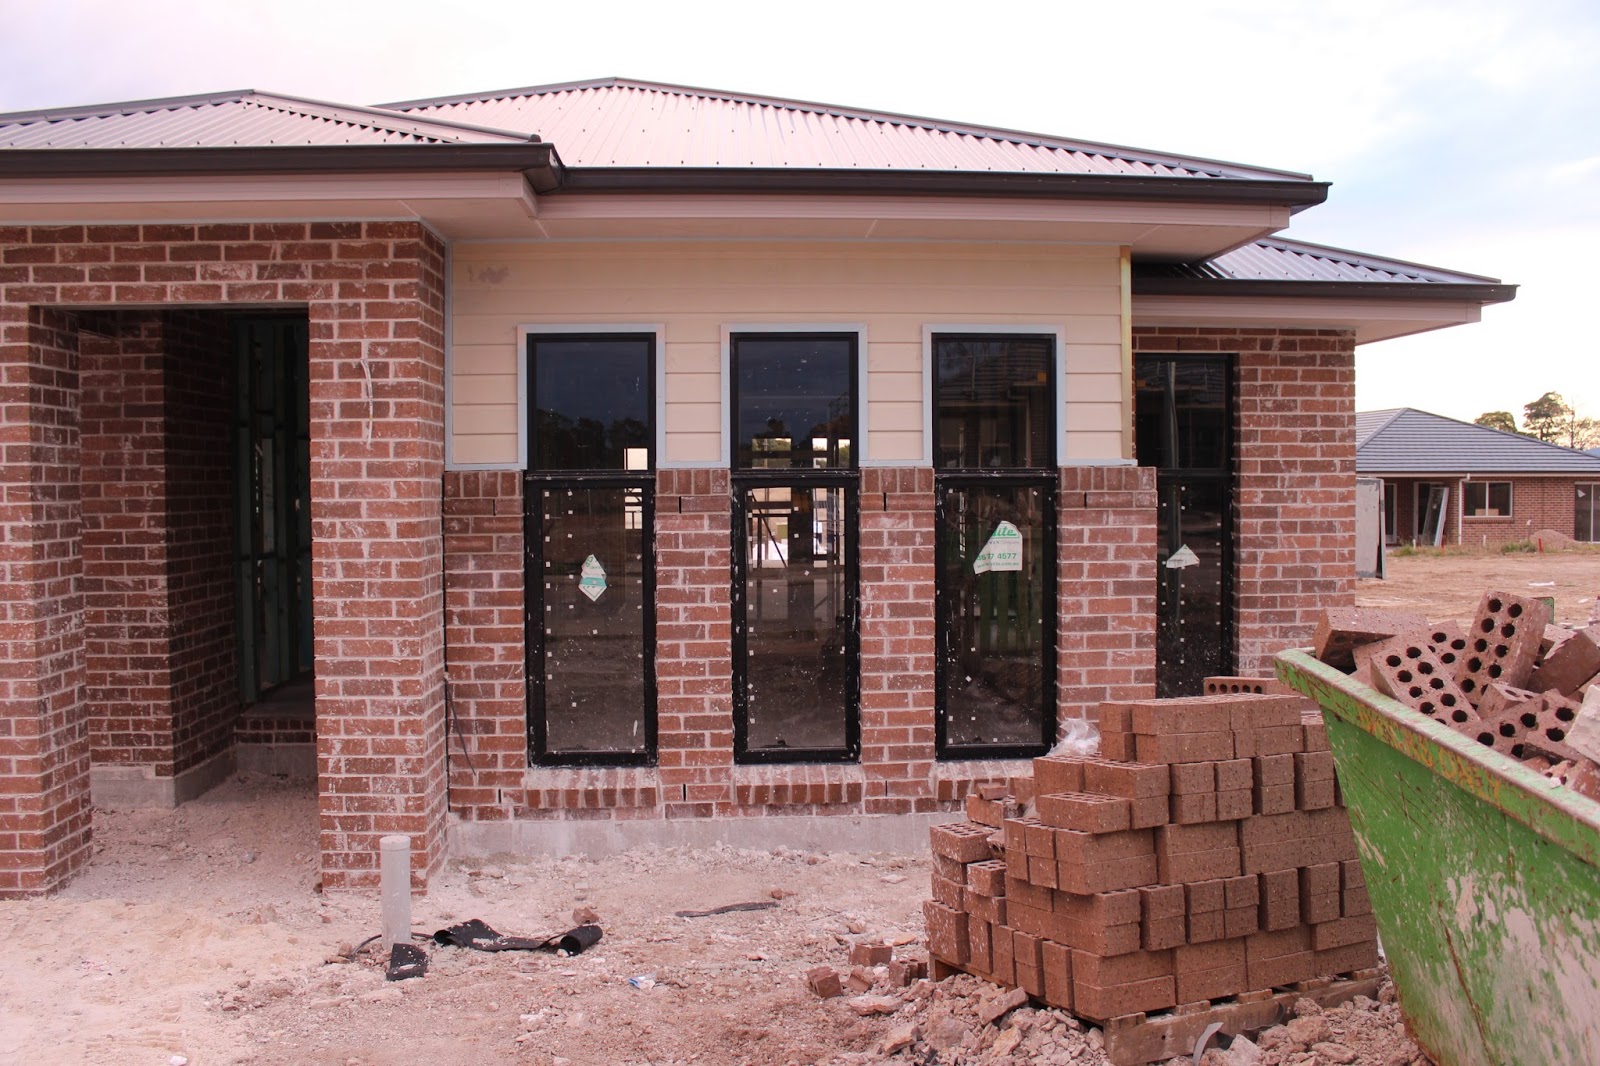
First up, our colour consultant for the day took us through the exterior colours.  Our selections went like this:-

Bricks: Gravel
Roof: Monument (Colorbond)
Gutters, Downpipes, Meter Box & Water Tank: Monument
Fascia: Dune
Garage Door: Dune
Cladding: Dune
Front Door: Dune
Eaves: Surfmist
Windows: APO Grey

Next we moved onto door handles for the doors throughout the house, including the front door, kitchen and bathroom cabinetry handles and WIR door handles. As we had increased the ceiling height to the entrance, we decided to upgrade the main bedroom doors. We also added a solid timber door and lock to our internal garage door (door added at tender stage).

Then it was over to choose paint colours. This was a little difficult. We knew what we wanted, but couldn't find the colour within the limited colour choices provided by EBH. In the end, after much procrastination, we settled on Kidskin for the walls and Crisp White for the skirting and architraves.

The last of the colour choices was the kitchen and bathroom vanities and bench tops. This took us some time as the colours in the brochures were not a true representation of the colour samples at HOG (It could have had something to do with the lighting). With regards to kitchen colours, we were planning upgrading but was advised by our colour consultant to choose a colour for the file and this would be over written once we had our kitchen appointment.  So our colour selection was done and dusted.


From here we saw Jenni from Outback Landscaping for our driveway. J and I had come into this appointment determined we would have a cement driveway. But after listening to the pros and cons of each, and the general maintenance of both, we ended up choosing pavers. We chose the Baines Charcoal pavers, laid in a stretcher bond pattern. We opted to upgrade to have the council crossover paved as well.  Outback were offering a $2 promotion where they would provide additional concrete/paving to the side of the house. I am not sure of the square meterage but it worked out that we would receive paving to one side of the house, the length of the garage.

Next we were off to meet with Alex from Kitchen Culture. Upon sitting down and sighting our kitchen layout that Alex had printed off, we were surprised to see that there were no overhead cabinets. Who builds a kitchen without overhead cabinets?? Turns out, all project builders don't, and it costs you an arm and a leg to include them! We were a little annoyed because we remember specifically asking our Sales Rep at Homeworld Kellyville whether the overhead cupboards were included and he confirmed that they were.  So to be told that they weren't was a bit of a blow.

The kitchen is where you can spend a lot of money on upgrades. For example, here are our upgrades.
  • Two sets of soft close pot draws either side of the oven
  • Overhead cabinets with a 100mm overhang in lieu of handles
  • A lift up door cupboard above the fridge space, 
  • A light shelf in each overhead cupboard for down lights
  • Bulkheads to overhead cabinets, including flyover panel above rangehood
  • Laminated panel behind rangehood
  • Sharknose detail to base cabinet doors and drawers 
  • Gloss polyurethane finish to kitchen cabinets, panels, and kickboard.
  • Catergory 1 Essastone - Crystal Chalk
  • Glass splash back
If anyone wants to know how much any of the above cost, please let me know. I would be happy to share with you.

We also opted to have KC fit out our laundry rather than try and have someone do it after handover. 

Here are our kitchen and laundry plans.


3D Kitchen Layout


Kitchen Plan


Laundry Plan


Our appointment with Cooks Plumbing was next. We wanted to keep the costs down seem as we just went overboard at our kitchen appointment.  Here is a list of our upgrades.


  • Gallery Leonardo Wall-Faced Soft Close Toilet (main & ensuite)
  • Caroma Classic 1700 Bath (main)
  • Novelli Disc Shower 200mm Square Rose & 300mm Ceiling Dropper
  • Dorf Enix Double Towel Rail - 900mm (main & ensuite)
  • Everpure Water Filter Std Tap Starter Kit
  • Everhard Benchline 45L Flushline Tub (laundry)
And some pics.......


Upgraded Shower Head


 Upgraded Toilet - Leonardo Wall Faced Soft Close Suite


Standard Basin for Main Bathroom & Ensuite


Standard Mixer for Bathroom & Ensuite


Standard Mixer for Shower


Standard Mixer & Tap for Bath


Standard Towel Rail


Standard Toilet Paper Holder


Standard Shower Head for Main Bathroom


Standard Kitchen Mixer


Standard Kitchen Sink


Standard Laundry Mixer


Standard Laundry Tapware


Upgraded Laundry In-Bench Laundry Tub


Handles for Laundry & Bathroom Cabinets


Sophia Lever Handles (satin chrome)


Upgraded Feature Door to Main Bedroom 


Upgraded Gainsborough Oblong Pull Handle for Front Door


Bathroom lights / ceiling fan
 

Sunday, 22 July 2012

Trying to decide on a brick

It was time to choose a brick so headed on out to PGH to take a look at our brick options. I felt sorry for the kids, they hate being dragged around doing "unfun stuff"!

We want a brown coloured brick. Something warm, chocolatey (mmmm). Needless to say, that before we choose a brick, I am sure we will change our minds a dozen times.

There are so many beautiful bricks colours but we soon realise that they (all of the bricks we really like) are not in the standard range.

Standard brick choices are:-

The Summervilla Collection

  • Vanilla
  • Pearl Grey
  • Mocha

The Alfresco Collection
  • Chocolatto 
  • Vino
  • Expresso
  • Sorbetto

I think there are some more but as they didn't appeal to us, we didn't pay attention to them (sorry).


Pearl Grey


Mocha


Vanilla

To assist us in making a decision, we obtained a list containing addresses from PGH for a number of brick colours we were tossing around.  Over the next few weekends we drove around The Ponds, Castle Hill & Bunya to view houses already built.

We were finding it extremely difficult to agree on a brick. We went from wanting a brown brick to a light brick, back to a brown brick, a darker brick, our procrastination was endless.

At first we thought we would select a brick in the standard range. We were originally going to go with Chocolatto until my friend, whom works for PGH, advised us against it due to it being a slurry (or painted) brick.  Therefore, we were swaying towards Mocha or perhaps Gravel (we agreed we would pay a little extra to upgrade).


House built using Gravel Bricks


Smoke


Nutmeg


House built using Smoke & Nutmeg


Loam 


House built using Loam

We tossed around the prospect of a smooth faced brick like Smoke (light) or Nutmeg (dark) but changed our minds because of the idea that many new schools and electricity substations use these two bricks, and in time, the brick seems to crack. I liked Loam but J didn't so that was out.  I liked Mild Steel, although a little lighter than we wanted, I really liked the texture of the brick, but J wasn't sold on this one either. J liked Blue Steel Flash but I wasn't fussed on the blue/grey tones, but then we discovered Nickel Flash. It had reddish brown tones and a really nice texture. We obtained the address of a house and took a drive out to see it. Believe it or not, we both agreed that this could be the one!

Nickel Flash was a category D (I think) upgrade. We decided that it was worth paying extra for as it would be the first thing you would see every time you drove into your driveway.


Nickel Flash

Our minds were made up....

Until they weren't :(